> ## Documentation Index
> Fetch the complete documentation index at: https://docs.ai21.com/llms.txt
> Use this file to discover all available pages before exploring further.
# MCP
> How to Use MCP in AI21 Studio
MCP (Model Context Protocol) is an open-source standard for connecting AI applications to external systems. Follow these steps to connect your agent in **AI21 Studio** to an MCP server.
### Step 1: **Go to the Playground Section**
Navigate to Maestro [**Playground**](https://studio.ai21.com/v2?tab=maestro) from the left-hand menu in AI21 Studio.
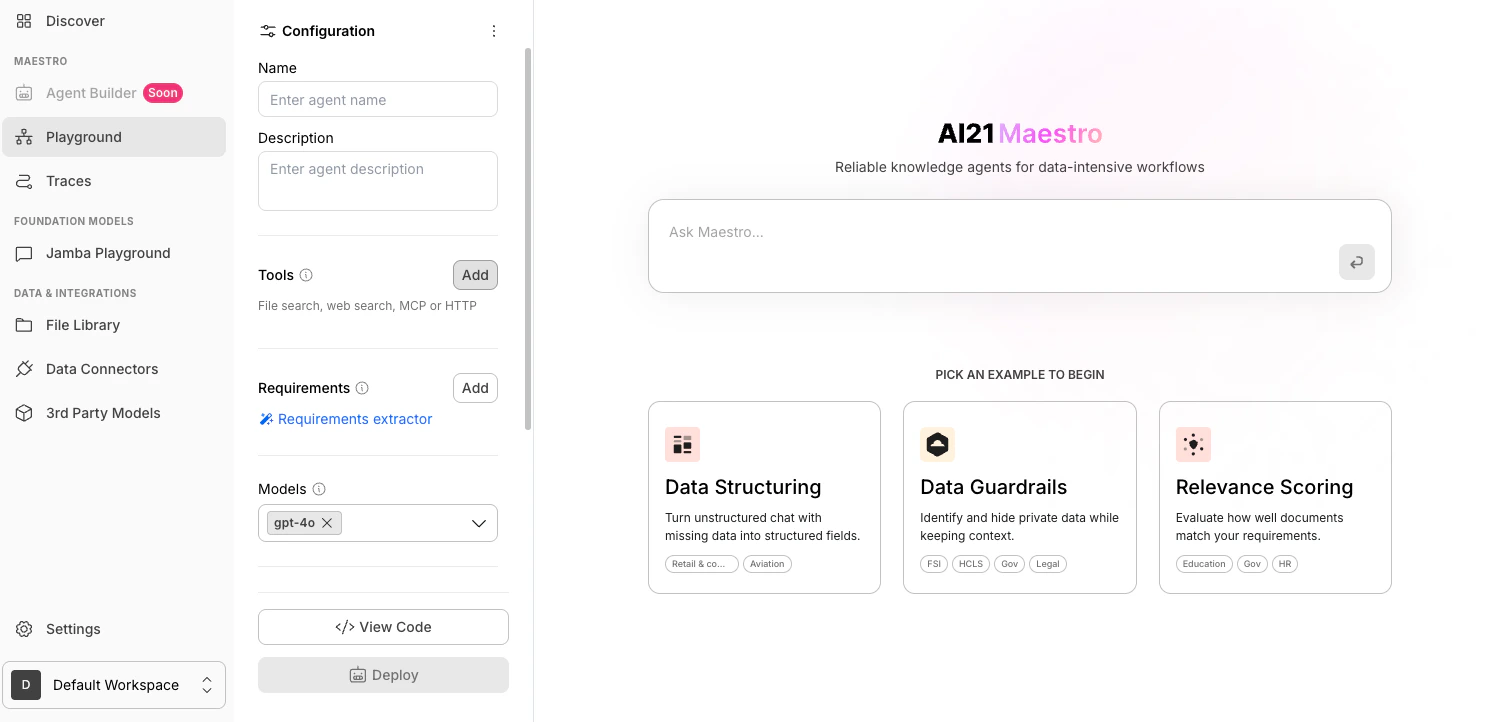
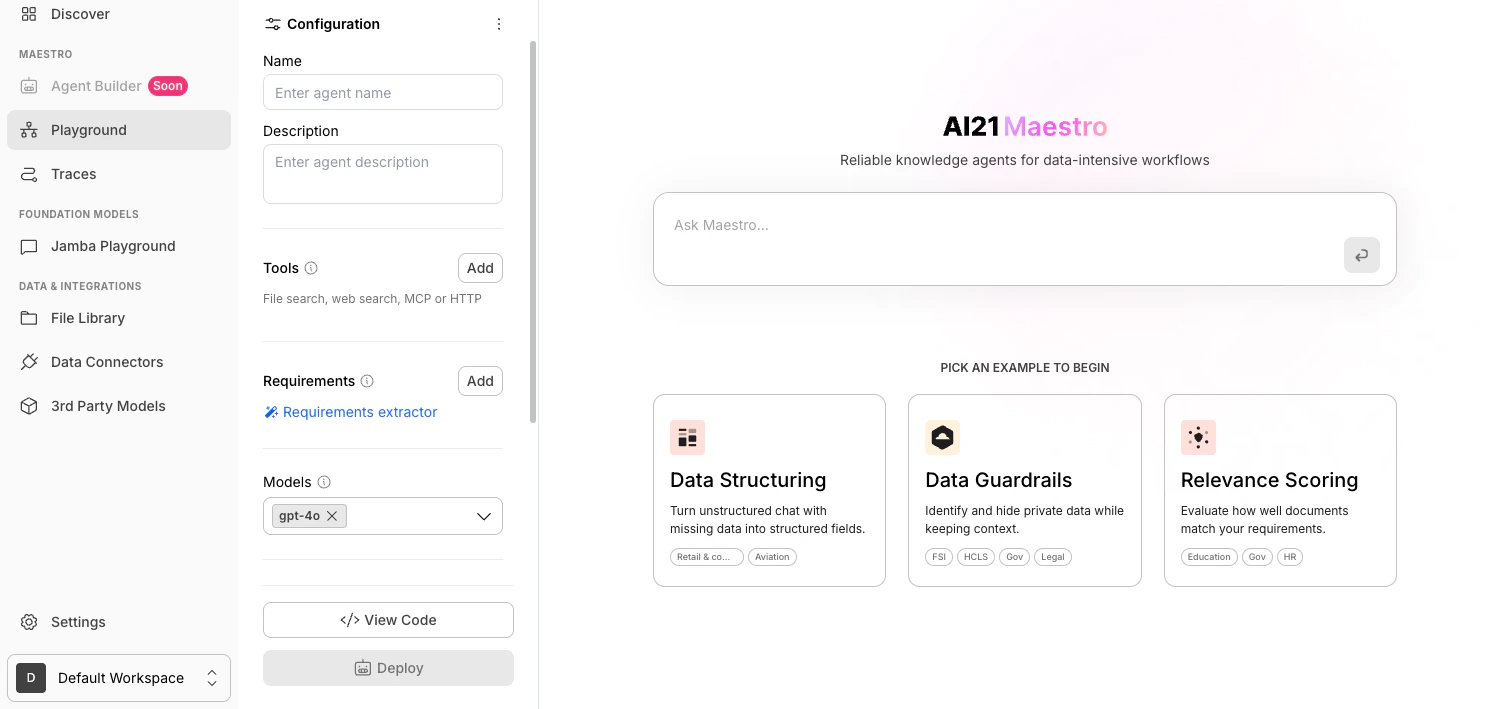 ### Step 2: Add a Tool
In the **Configuration** panel, go to the **Tools** section and click **Add**.
### Step 2: Add a Tool
In the **Configuration** panel, go to the **Tools** section and click **Add**.
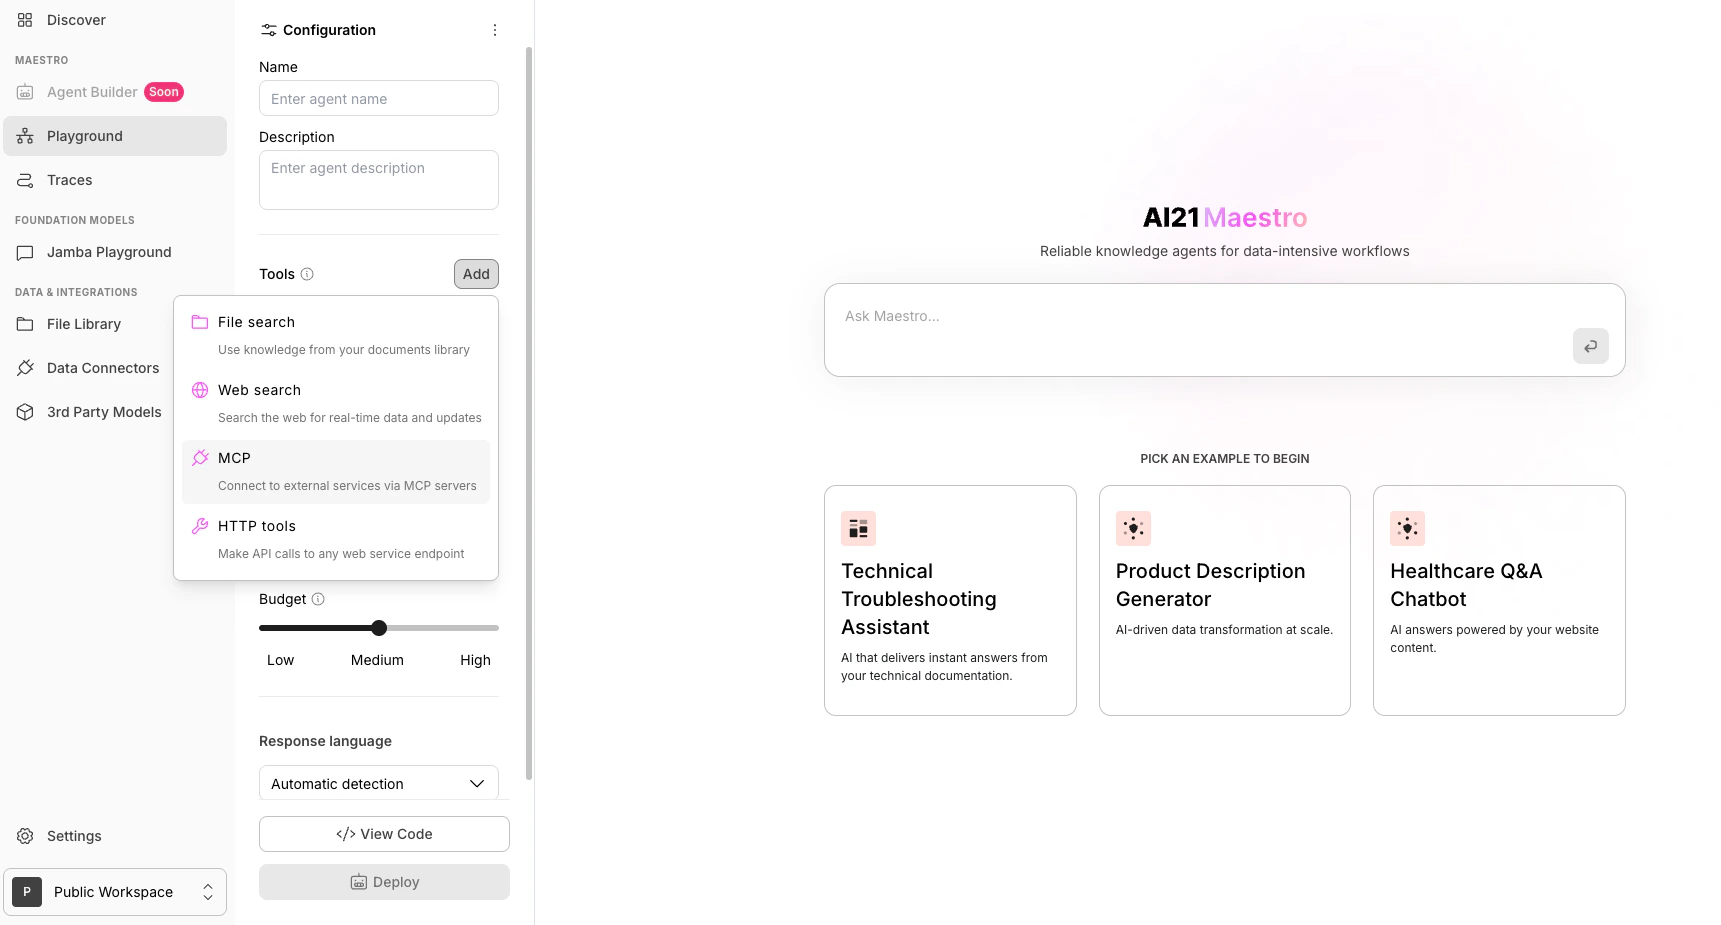
 ### **Step 3: Select MCP**
In the tools dropdown, select **MCP**.
### **Step 3: Select MCP**
In the tools dropdown, select **MCP**.
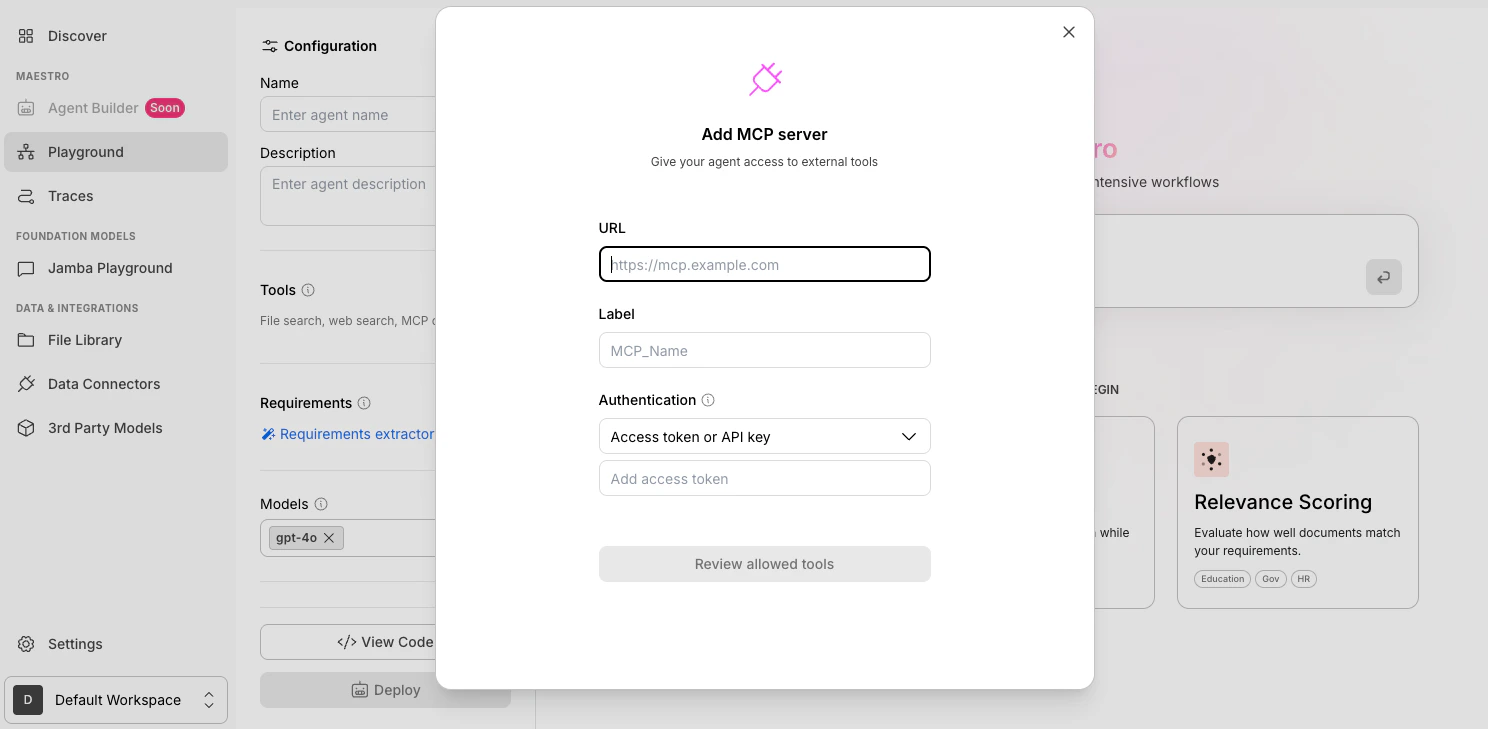
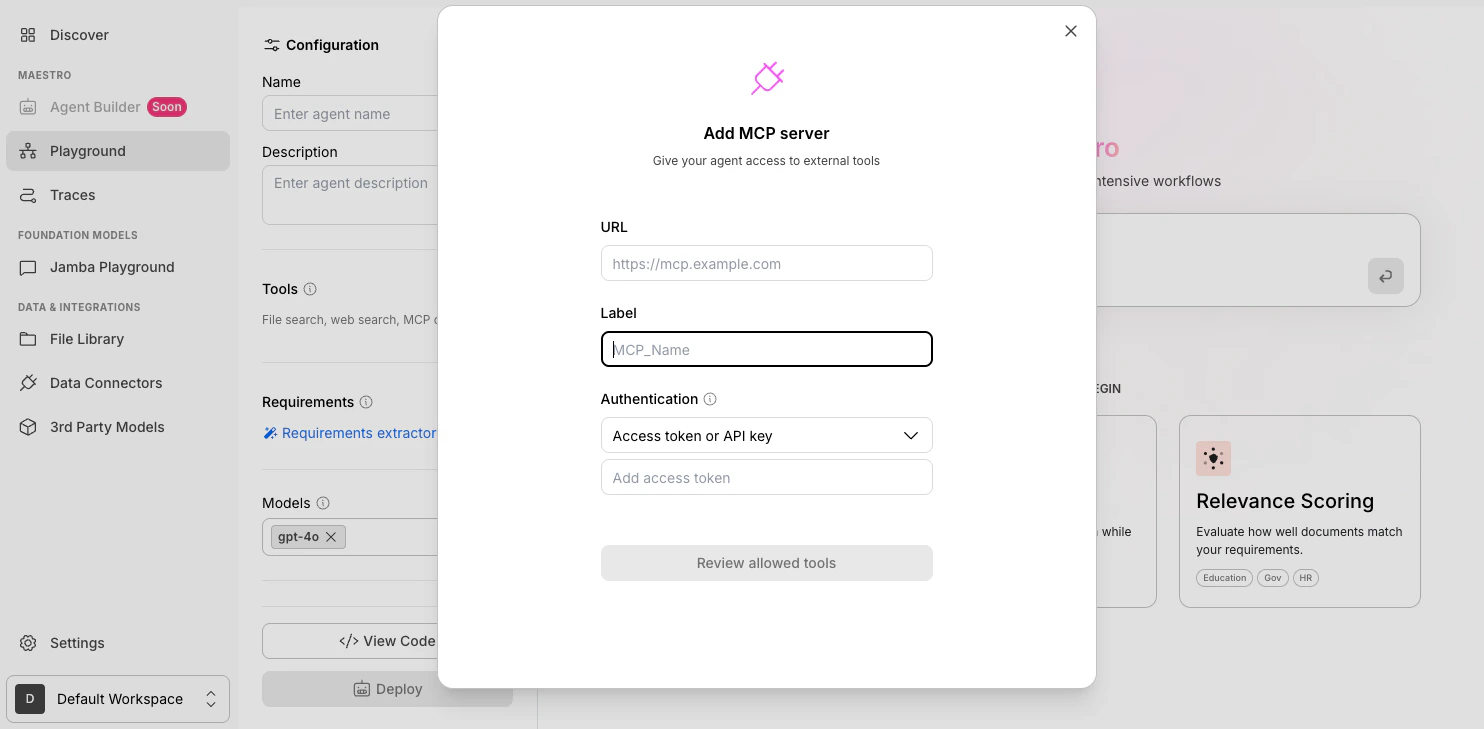
 ### **Step 4: Fill in the Fields**
**4.1 Add a URL**\
Enter the MCP server address in the **URL** field.
### **Step 4: Fill in the Fields**
**4.1 Add a URL**\
Enter the MCP server address in the **URL** field.
 **Handling “Invalid URL” Errors**\
\
If you see the **“Invalid URL”** error when adding your MCP server in AI21 Studio, it usually means:
* The server is using `http://` instead of `https://`
* The server is running on a raw IP address and isn’t exposed as a public HTTPS endpoint
**How to fix it:** Set up an **ngrok tunnel** (or a similar tool) to expose your local server over HTTPS, which passes validation.
\
For full setup instructions, see the [MCP Server Setup guide](https://docs.ai21.com/docs/mcp-server-setup-guide).
\
**4.2 Add a Label**\
Enter a descriptive **Label** to identify the MCP server.
**Handling “Invalid URL” Errors**\
\
If you see the **“Invalid URL”** error when adding your MCP server in AI21 Studio, it usually means:
* The server is using `http://` instead of `https://`
* The server is running on a raw IP address and isn’t exposed as a public HTTPS endpoint
**How to fix it:** Set up an **ngrok tunnel** (or a similar tool) to expose your local server over HTTPS, which passes validation.
\
For full setup instructions, see the [MCP Server Setup guide](https://docs.ai21.com/docs/mcp-server-setup-guide).
\
**4.2 Add a Label**\
Enter a descriptive **Label** to identify the MCP server.
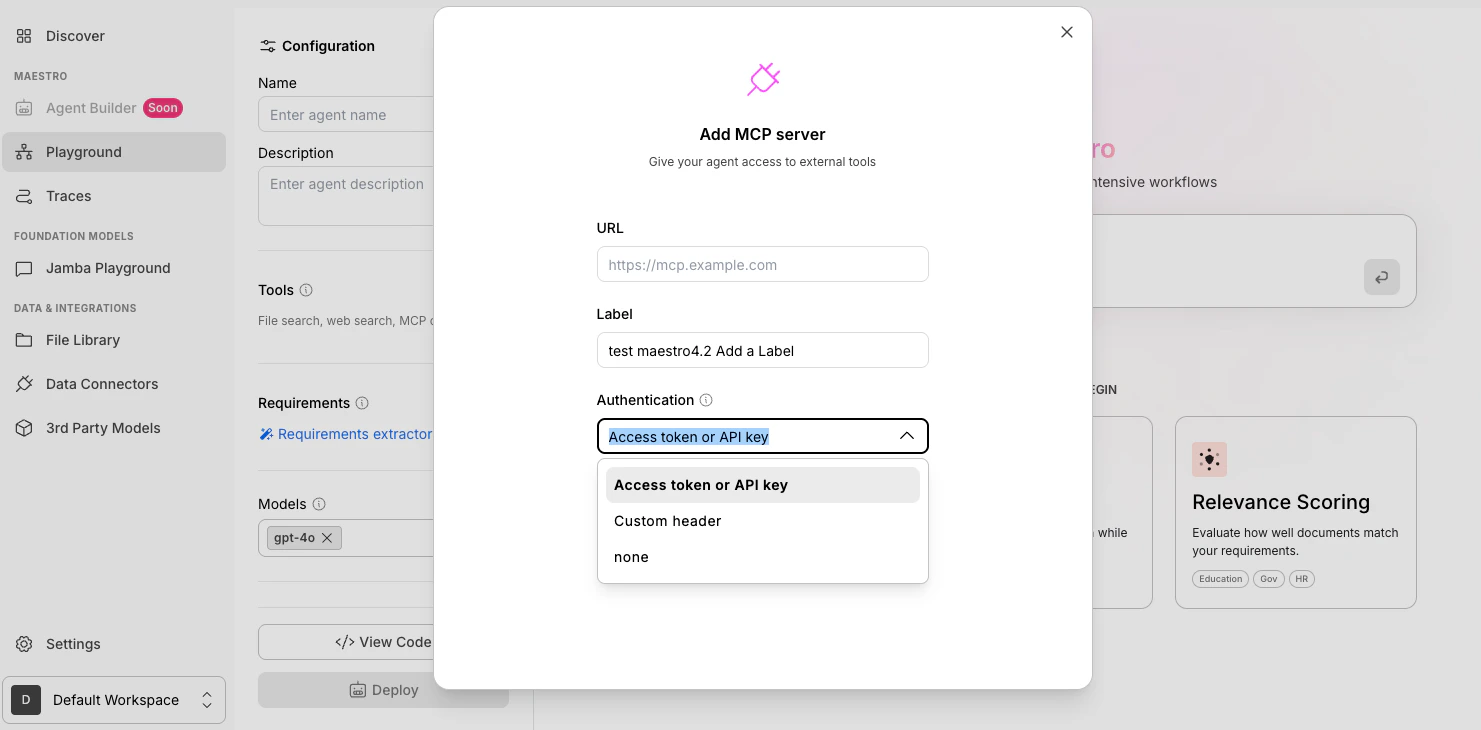
 **4.3 Add Authentication** \
From the **Authentication** dropdown, select the authentication method (for example, API key or access token) and provide the credentials.
Authorization headers are not saved with the agent. If you save the agent, the headers will not be stored. When you reload the agent, you’ll need to enter the authorization headers again.
**4.3 Add Authentication** \
From the **Authentication** dropdown, select the authentication method (for example, API key or access token) and provide the credentials.
Authorization headers are not saved with the agent. If you save the agent, the headers will not be stored. When you reload the agent, you’ll need to enter the authorization headers again.
 ### **Step 5: Review Allowed Tools**
Click **Review allowed tools**.
### **Step 5: Review Allowed Tools**
Click **Review allowed tools**.
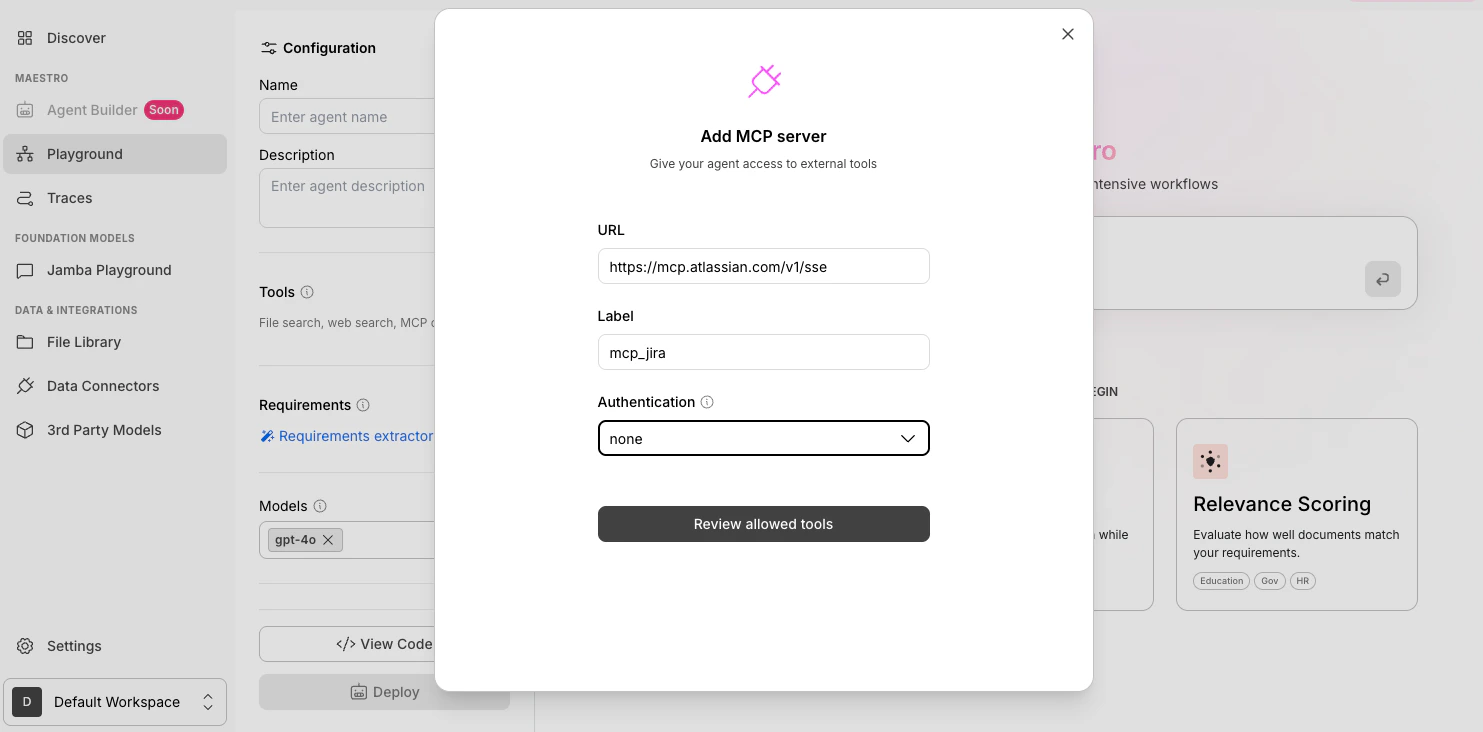 You will see a list of tools available from the MCP server.
### **Step 6: Save the Tools**
After verifying the tools are correct, click **Save**.
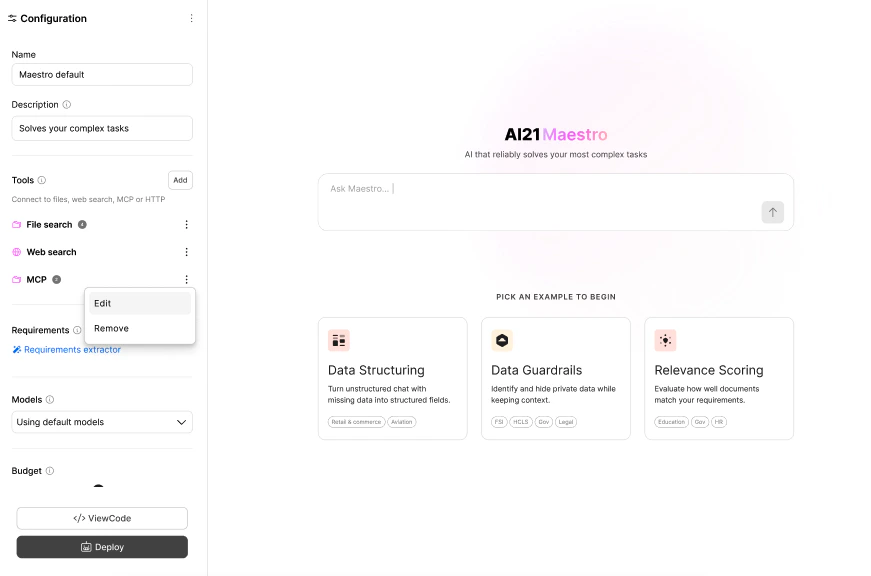
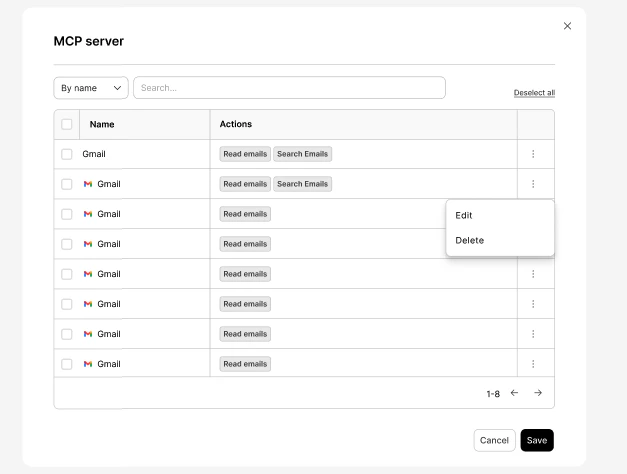
### **Step 7 (Optional): Edit MCP Tools**
Edit an existing MCP tool by following these steps:
1. Click the **⋮** (colon icon).
2. Select **Edit**, make your changes, and click **Save.**
You will see a list of tools available from the MCP server.
### **Step 6: Save the Tools**
After verifying the tools are correct, click **Save**.
### **Step 7 (Optional): Edit MCP Tools**
Edit an existing MCP tool by following these steps:
1. Click the **⋮** (colon icon).
2. Select **Edit**, make your changes, and click **Save.**
 ### Next Steps
Use MCP in [AI21 Stuido](https://studio.ai21.com/v2?tab=maestro).
### Next Steps
Use MCP in [AI21 Stuido](https://studio.ai21.com/v2?tab=maestro).